 velvet oracle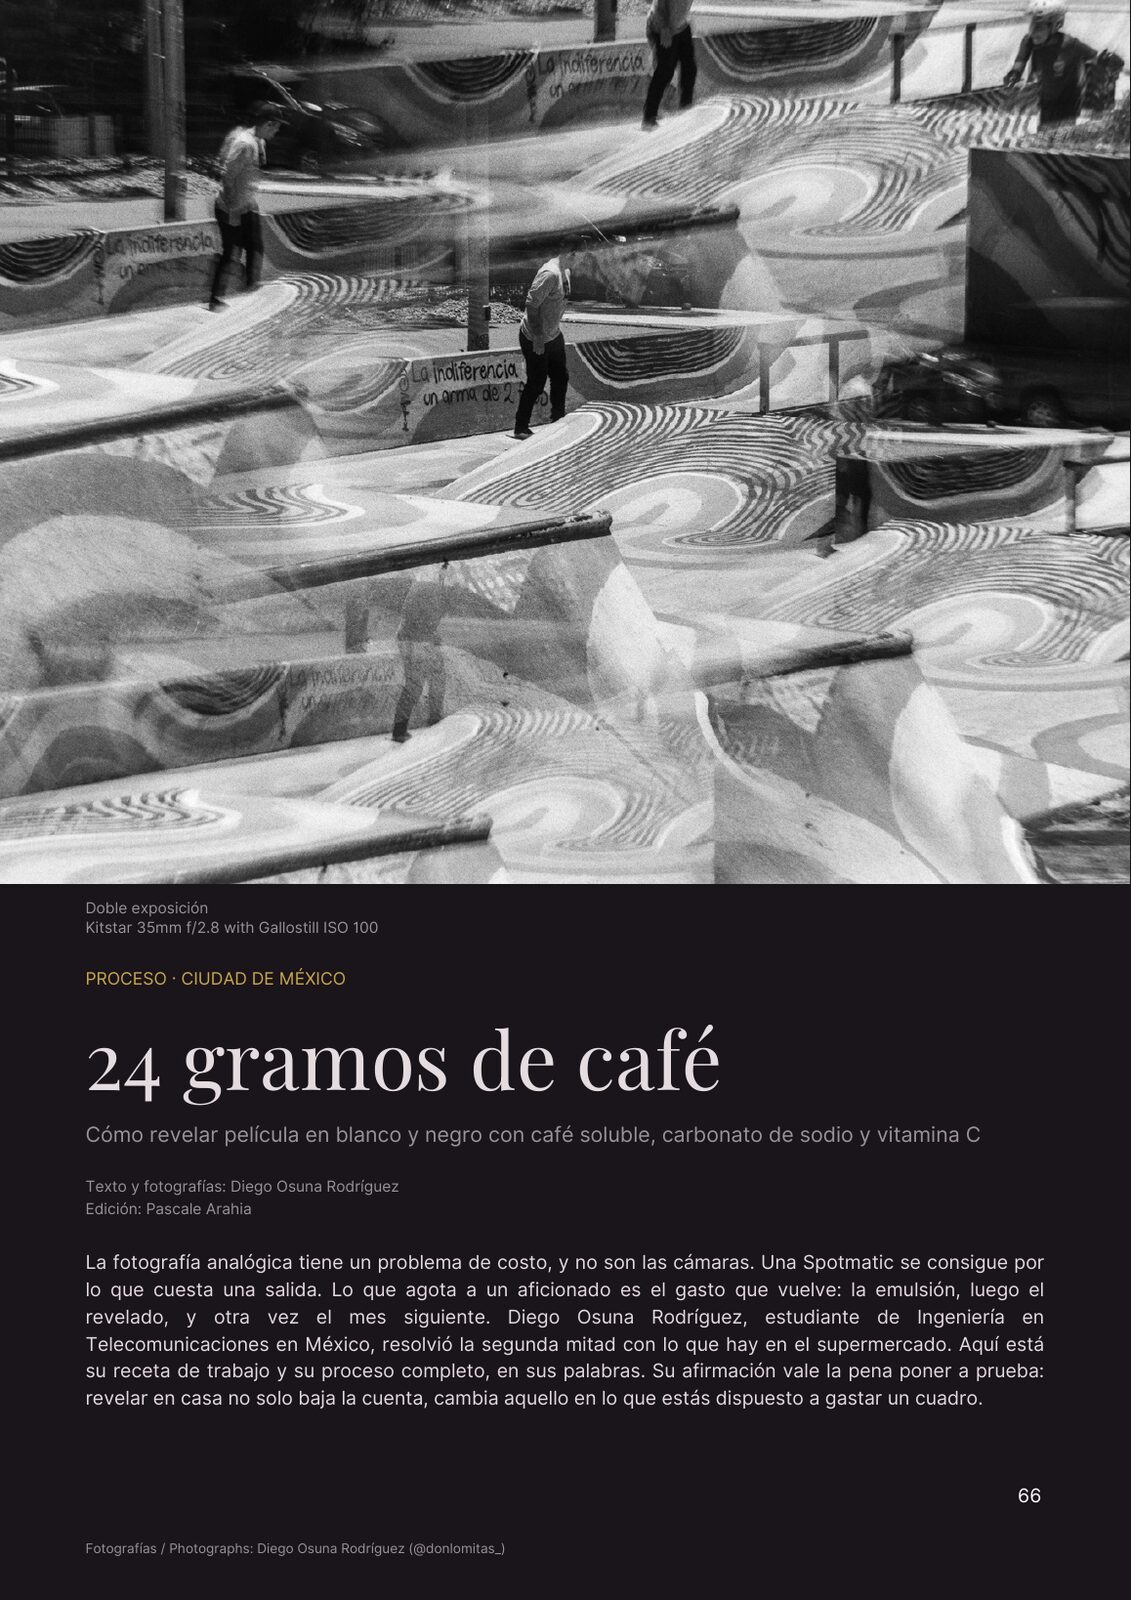
How to develop black and white film with instant coffee, washing soda and vitamin C.
PROCESS · MEXICO CITY. Words and photographs: Diego Osuna Rodríguez. Editing: Pascale Arahia.
Film photography has a cost problem, and it isn’t the cameras. A Spotmatic can be had for the price of a night out. What breaks a hobbyist is the spend that keeps returning: emulsion, then processing, then again next month. Diego Osuna Rodríguez, a telecommunications engineering student in Mexico, solved the second half of that with what’s on the supermarket shelf. Below is his working recipe and his full process, in his words. The claim he makes is worth testing: developing at home doesn’t only cut the bill, it changes what you’re willing to spend a frame on.
Hey Pascale! It’s a real pleasure to write to you and share my photography journey with you and everyone reading Velvet.
My name is Diego Osuna Rodríguez, a telecommunications engineering student from Mexico. I’m not a professional photographer, just an enthusiast who loves capturing a moment and keeping it forever.
Let’s be clear: film photography gets ridiculously expensive when you’re a hobbyist. Gear is pricey, vintage hype inflates costs, and film emulsions along with processing chemistry get more expensive by the day. Wanting to shoot black and white without breaking the bank, I started searching for alternatives. That’s when I found Café Raíces y Cultura (CRC), a community space run by talented people passionate about both coffee and photography. They encouraged me to try doing it myself, introducing me to a single word that changed everything: Caffenol.
Developing with coffee is simpler than you might think. Ingredients are cheap and accessible, and the whole process takes about 30 minutes. My go-to Caffenol-C-M recipe works well for films like Arista or Fomapan, as well as Gallostill ISO 100, which is expired Eastman colour cinema film hand spooled locally here in Mexico and shot as black and white.
The recipe
Caffenol-C-M. C = Vitamin C · M = Medium
- Distilled water — 500 ml
- Sodium carbonate (washing soda) — 30 g
- Ascorbic acid (vitamin C) — 10 g
- Instant coffee — 24 g
Sourcing the ingredients is easy: grocery store instant coffee, hardware store washing soda, pharmacy vitamin C powder. For fixing, I even use dental X-ray fixer, though any standard fixer works.
Step by step
Developer prep
- Dissolve 30 g of washing soda in 400 ml of distilled water until completely clear.
- Stir in 10 g of vitamin C until the solution is even.
- Stir in 24 g of instant coffee until smooth, with no lumps. After the foam settles, add the remaining 100 ml of water.
Developing
- Pour the developer into the tank and seal it. Minute one gets gentle, constant inversions, followed by a firm tap on the table. Then let it rest.
- From minutes 2 to 11, three inversions during the first 10 seconds, tap the table, rest for the remainder of the minute.
- Dump the coffee developer at minute 12.
Stop and fix
- Run a 30 second stop bath using distilled water with a splash of vinegar.
- Rinse with tap water until the water leaving the tank runs completely clear.
- Pour in 500 ml of fixer and seal. Gentle, constant inversions through the first minute, then a firm tap on the table. Let it rest.
- From minutes 2 to 5, three inversions during the first 10 seconds, tap, rest.
- Dump the fixer.
Wash and dry
- Use the Ilford wash method:
- Fill the tank with tap water, 5 inversions, dump.
- Refill, 10 inversions, dump.
- Refill, 20 inversions, dump.
- Refill, 40 inversions, dump.
- Take the film off the reel and hang it somewhere cool, dry and dust free. I digitise each frame later in my cave, using my everyday digital camera.
Important notes
All liquids must be held at 20 °C to prevent thermal shock.
The taps on the table are to release air bubbles trapped against the film.
I’ve used dental X-ray fixer, but it makes no difference. Any other fixer works.
The coffee gets dumped. The fixer gets saved.
I don’t believe I’ve ever had a failed batch. Every result feels entirely mine. Early on, I felt like I’d ruined shots, but experimenting taught me the rules: softer agitation produces finer grain, longer dev times increase contrast (at the expense of highlight detail), and pushing film requires about +15% dev time per stop.
There’s no absolute recipe for this. You can make Caffenol as much your own as you want, you just have to decide what you’re looking for in your photography. If one day I want contrast, I develop longer. If another day I want heavy grain, I agitate vigorously. If I want something completely different, I tweak the formula.
Developing at home gave me total freedom over my craft without the commercial price tag. So, you know, don’t be afraid to make a mess. Embrace the experiment.
Every result feels entirely mine.
— Diego Osuna Rodríguez
Editor’s note: This process uses chemicals. Work in a ventilated space, avoid skin and eye contact, and don’t pour used fixer down the drain: it holds dissolved silver and should go to a collection point.
All photographs were captured with a Pentax Spotmatic SPII. Processed photos: Super-Takumar 55mm f/2. Film stocks, process photos and Popocatépetl: Arista/Fomapan ISO 100. Photographs: Diego Osuna Rodríguez (@donlomitas_).
24 gramos de café
Cómo revelar película en blanco y negro con café soluble, carbonato de sodio y vitamina C.
PROCESO · CIUDAD DE MÉXICO. Texto y fotografías: Diego Osuna Rodríguez. Edición: Pascale Arahia.
La fotografía analógica tiene un problema de costo, y no son las cámaras. Una Spotmatic se consigue por lo que cuesta una salida. Lo que agota a un aficionado es el gasto que vuelve: la emulsión, luego el revelado, y otra vez el mes siguiente. Diego Osuna Rodríguez, estudiante de Ingeniería en Telecomunicaciones en México, resolvió la segunda mitad con lo que hay en el supermercado. Aquí está su receta de trabajo y su proceso completo, en sus palabras. Su afirmación vale la pena poner a prueba: revelar en casa no solo baja la cuenta, cambia aquello en lo que estás dispuesto a gastar un cuadro.
¡Hey, Pascale! Es un gusto poder escribirte y un placer poder compartir esta experiencia fotográfica contigo y con todos los que leen Velvet.
Mi nombre es Diego Osuna Rodríguez y soy un estudiante de Ingeniería en Telecomunicaciones originario de México. No soy un fotógrafo profesional ni mucho menos, solo soy un entusiasta que disfruta el momento y luego lo guarda.
Es bien sabido que el costo de la fotografía es muy elevado cuando solo eres un aficionado. Los equipos son caros, las casas fotográficas se aprovechan del boom vintage y las emulsiones son cada día más caras junto con los químicos para tratarlas. Buscando hacer fotografía blanco y negro sin vaciar mi cartera encontré el Café Raíces y Cultura (CRC), un espacio abierto al público que es administrado por personas muy talentosas, tanto para el café como para la fotografía. Estas personas me animaron a hacerlo por cuenta propia y me introdujeron una palabra que lo cambió todo: “Caffenol”.
Entender el Caffenol es más fácil de lo que uno puede pensar. La materia prima se consigue fácil y el proceso completo es de 30 minutos cuando se tiene todo listo. Aquí comparto la receta que me funciona, para película Arista/Fomapan 100, 200 y 400, además de cargas manuales de película a color Eastman caduca, conocida como Gallostill aquí en México, tirada a ISO 100 para blanco y negro.
La receta
Caffenol-C-M. C = Vitamina C · M = Medio
- Agua destilada — 500 ml
- Carbonato de sodio — 30 g
- Ácido ascórbico — 10 g
- Café soluble — 24 g
Los ingredientes los puedes conseguir fácilmente en el supermercado y en una droguería de materias primas. Para el fijador yo usé fijador para radiografía dental, pero cualquier fijador funciona.
Paso a paso
Revelador
- Disolver en 400 ml de agua destilada 30 g de carbonato de sodio hasta homogenizar la solución y volverla completamente cristalina.
- Mezclar 10 g de ácido ascórbico (vitamina C) y homogenizar.
- Mezclar 24 g de café soluble y batir hasta que no quede un grumo. Dejar reposar hasta que las burbujas desaparezcan y agregar los 100 ml de agua destilada restantes.
Revelado
- Verter el revelador en el tanque de revelado y tapar. Hacer inversiones suaves pero constantes durante el primer minuto y dar un golpe firme sobre la mesa. Dejar reposar.
- Del minuto 2 al minuto 11, hacer tres inversiones durante los primeros 10 segundos, golpear sobre la mesa y dejar reposar el resto del minuto.
- Vaciar el revelador al minuto 12.
Paro y fijador
- Hacer un baño de paro con agua destilada y un chorro de vinagre por 30 segundos.
- Enjuagar con agua del grifo hasta que la misma salga del tanque completamente cristalina.
- Verter 500 ml de fijador y tapar. Hacer inversiones suaves pero constantes durante el primer minuto y dar un golpe firme sobre la mesa. Dejar reposar.
- Del minuto 2 al minuto 5, hacer tres inversiones durante los primeros 10 segundos, golpear sobre la mesa y dejar reposar el resto del minuto.
- Vaciar el fijador.
Lavado y secado
- Hacer un lavado por el método Ilford:
- Llenar el tanque con agua del grifo, hacer 5 inversiones, tirar agua.
- Llenar el tanque, hacer 10 inversiones, tirar agua.
- Llenar el tanque, hacer 20 inversiones, tirar agua.
- Llenar el tanque, hacer 40 inversiones, tirar agua.
- Sacar la película del tanque y colgar en un lugar fresco, seco y libre de polvo.
Notas importantes
Todos los líquidos tienen que estar a 20 °C para evitar choque térmico.
Los golpes en la mesa son para desprender las burbujas atrapadas en la película.
Para el fijador se ha usado fijador de radiografía dental, pero es indistinto. Se puede usar cualquier otro fijador.
El café se tira, el fijador se conserva.
No creo haber tenido nunca un lote fallido. Cada resultado se siente completamente mío. Al principio sentí que había echado a perder algunas tomas, pero experimentar me enseñó lo siguiente: un agitado más suave produce un grano más fino, tiempos de revelado más largos aumentan el contraste (pero pierdes detalle en las luces altas) y forzar la película requiere aproximadamente un +15 % de tiempo de revelado por cada paso.
No hay una receta absoluta para hacerlo. Puedes hacer el Caffenol tan tuyo como quieras, solo tienes que decidir qué es lo que buscas en tu fotografía. Si un día quiero contraste, revelo más tiempo. Si otro quiero mucho grano, agito con fuerza. Si no quiero nada igual, cambio la fórmula.
Revelar en casa me ha dado total libertad sobre lo que quiero sin tener que pagar los precios comerciales. Así que ya saben, no le tengan miedo al cochinero y sigan experimentando.
Cada resultado se siente completamente mío.
— Diego Osuna Rodríguez
Nota de la editora: Este proceso usa químicos. Trabaja en un espacio ventilado, evita el contacto con la piel y los ojos, y no viertas el fijador usado al drenaje: contiene plata disuelta y se debe llevar a un punto de recolección.
Fotografías: Diego Osuna Rodríguez (@donlomitas_).